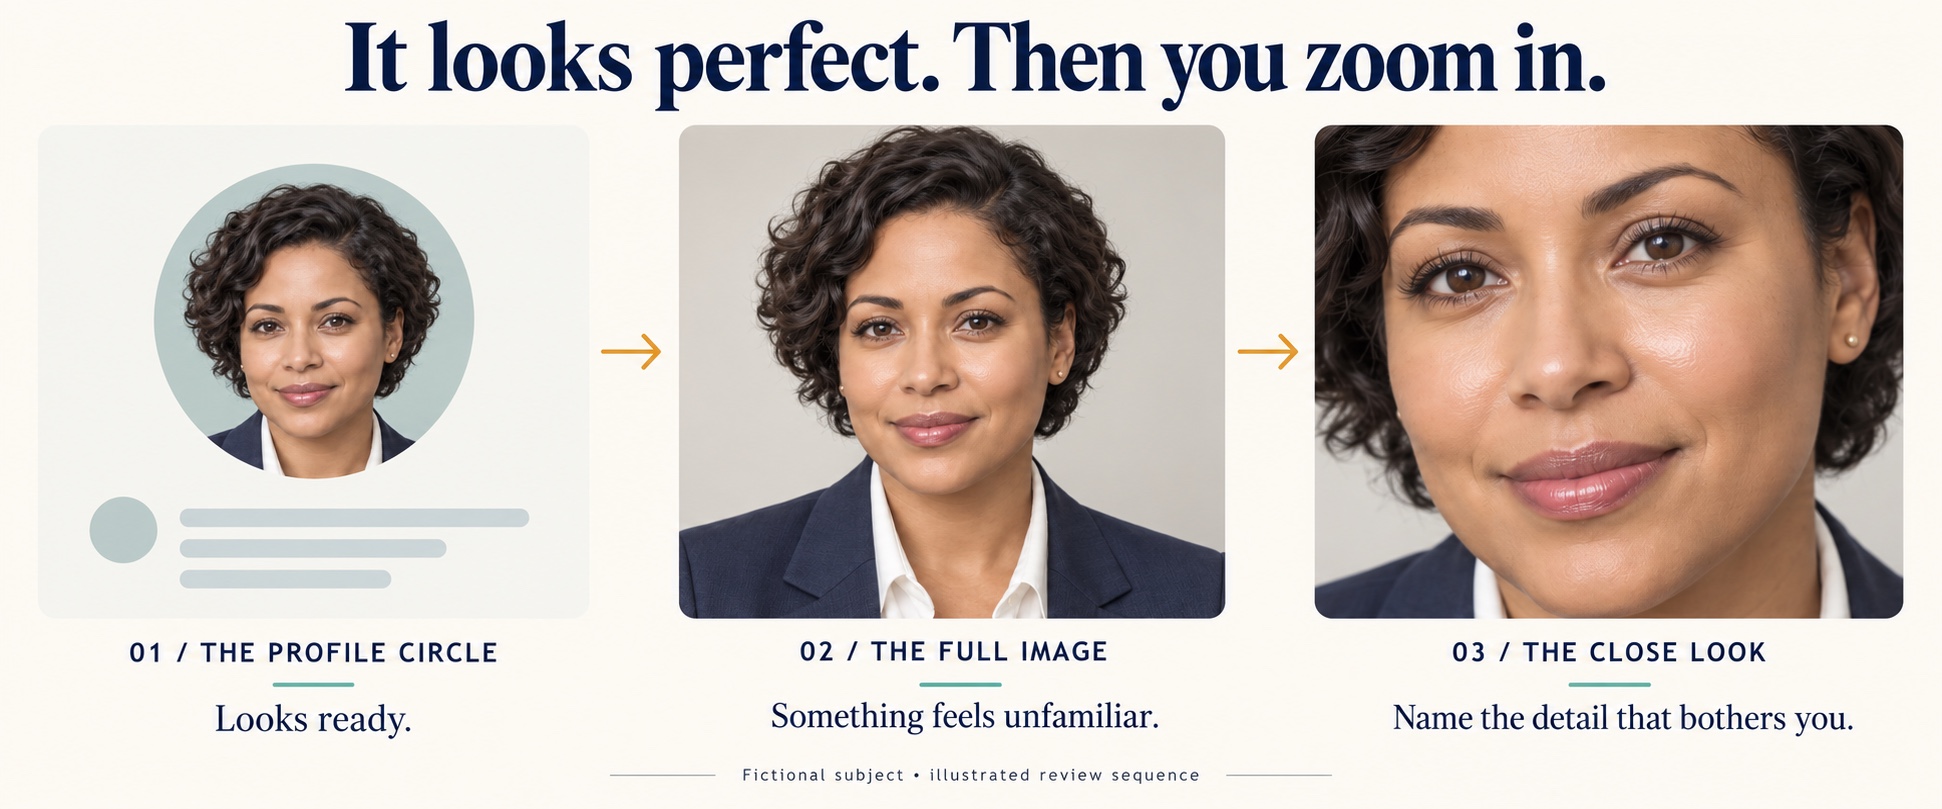
POV: the headshot you almost upload
Imagine you're updating your professional profile before an important meeting.
Your new headshot looks excellent. The jacket fits. The background is quiet. The lighting suggests a photographer who knows exactly what they're doing. In the little profile circle, you look rested, capable, ready.
Then you open the full-size image.
The cheek has the sheen of polished wax. A fold in the shirt becomes a smooth white smear. Your familiar smile is there, but something about the face feels borrowed.
You close the image. Open it again.
Would someone who knows me recognize this as me?
That pause is where a useful headshot review begins. If you're trying to fix an uncanny AI headshot, start by naming the detail that bothers you. “Looks fake” is a feeling. “The cheek has lost all its texture” is a problem you can work on.
The opening sequence follows a fictional subject from the profile circle to the close look. It dramatizes the review rather than documenting a test. The comparisons below are also editorial illustrations, not measured outputs from two MyPhotoAI workflows.
A convincing face can still be the wrong face
The easy story says artificial faces give themselves away. Look for perfect skin, symmetrical eyes, and a suspiciously good jawline; the mystery solves itself.
Two experiments make that checklist less reassuring.
In a 2022 study, Sophie Nightingale and Hany Farid found that participants without training distinguished real photographs from StyleGAN2-generated faces with 48.2% average accuracy, close to the 50% chance level.1
In a 2023 experiment by Elizabeth Miller and colleagues, White AI-generated faces were judged human more often than real White faces. The result concerned the selected faces and participants in that study; it should not be generalized to every skin tone, generator, or setting.2
These studies tested judgments about whether faces were synthetic. They did not establish whether a generated headshot faithfully represents its subject, or whether recruiters reject particular portraits.
For your own profile, ask two separate questions: Does the image hold together visually? Does it still look like me? A beautifully rendered stranger fails the second test.
Here, “uncanny valley” describes the uneasy feeling a portrait produces. The checks below help you assess an image's suitability. They cannot certify that any photograph is real or synthetic.
Follow your eye through four small details
Put a recent, unfiltered reference photo beside the generated portrait. Match the face sizes before comparing. Begin with the whole face, then inspect these areas at the image's native resolution.
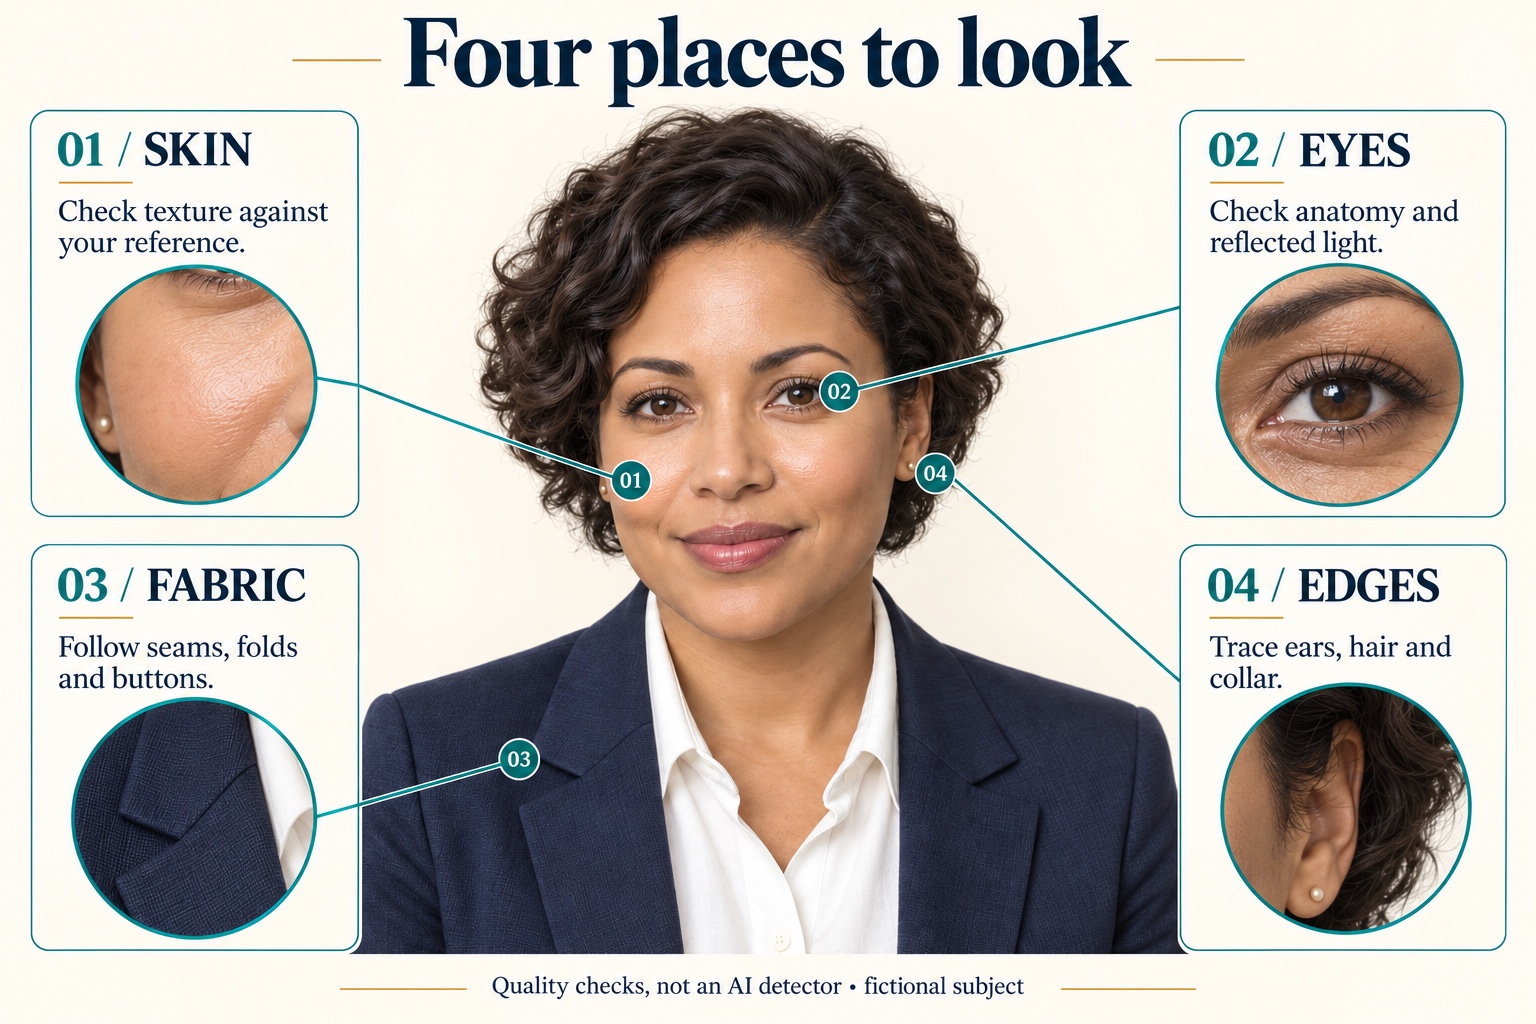
Start with the whole face. The numbered map gives your eye a route through the four checks.
1. Skin: has the face become one surface?
Look across the cheek, forehead, and area around the mouth. Do the transitions feel plausible, or has every surface been given the same glossy finish?
In our illustration, the left portrait has smoother cheek detail and a broad shine. The right keeps more local variation. Neither supplies a universal rule about how skin should look.
Makeup, soft lighting, focus, and ordinary retouching can all affect visible texture. You don't need pores etched into every pixel. You need a result that suits the person's age, complexion, and reference.
First move: reduce any extra smoothing you've applied. Compare again before adding texture. If the detail was never present, sharpening cannot recover the person's actual skin.
2. Eyes: do the reflections belong to the scene?
The bright shapes in the eyes are catchlights. Examine them alongside the rest of the portrait: the shadows around the nose, light on the cheeks, and reflection in any glasses.
Both eyes can reflect the same light source. Similar highlights alone are not a reason to reject an image. In our detail plate, both treatments have plausible eye reflections.
Look instead for broken shapes, smeared pupils, distorted glasses, or an eye that has changed shape compared with your reference.
First move: keep a candidate with coherent eyes and familiar proportions. A face with materially changed eyes usually warrants another candidate rather than a cosmetic patch.
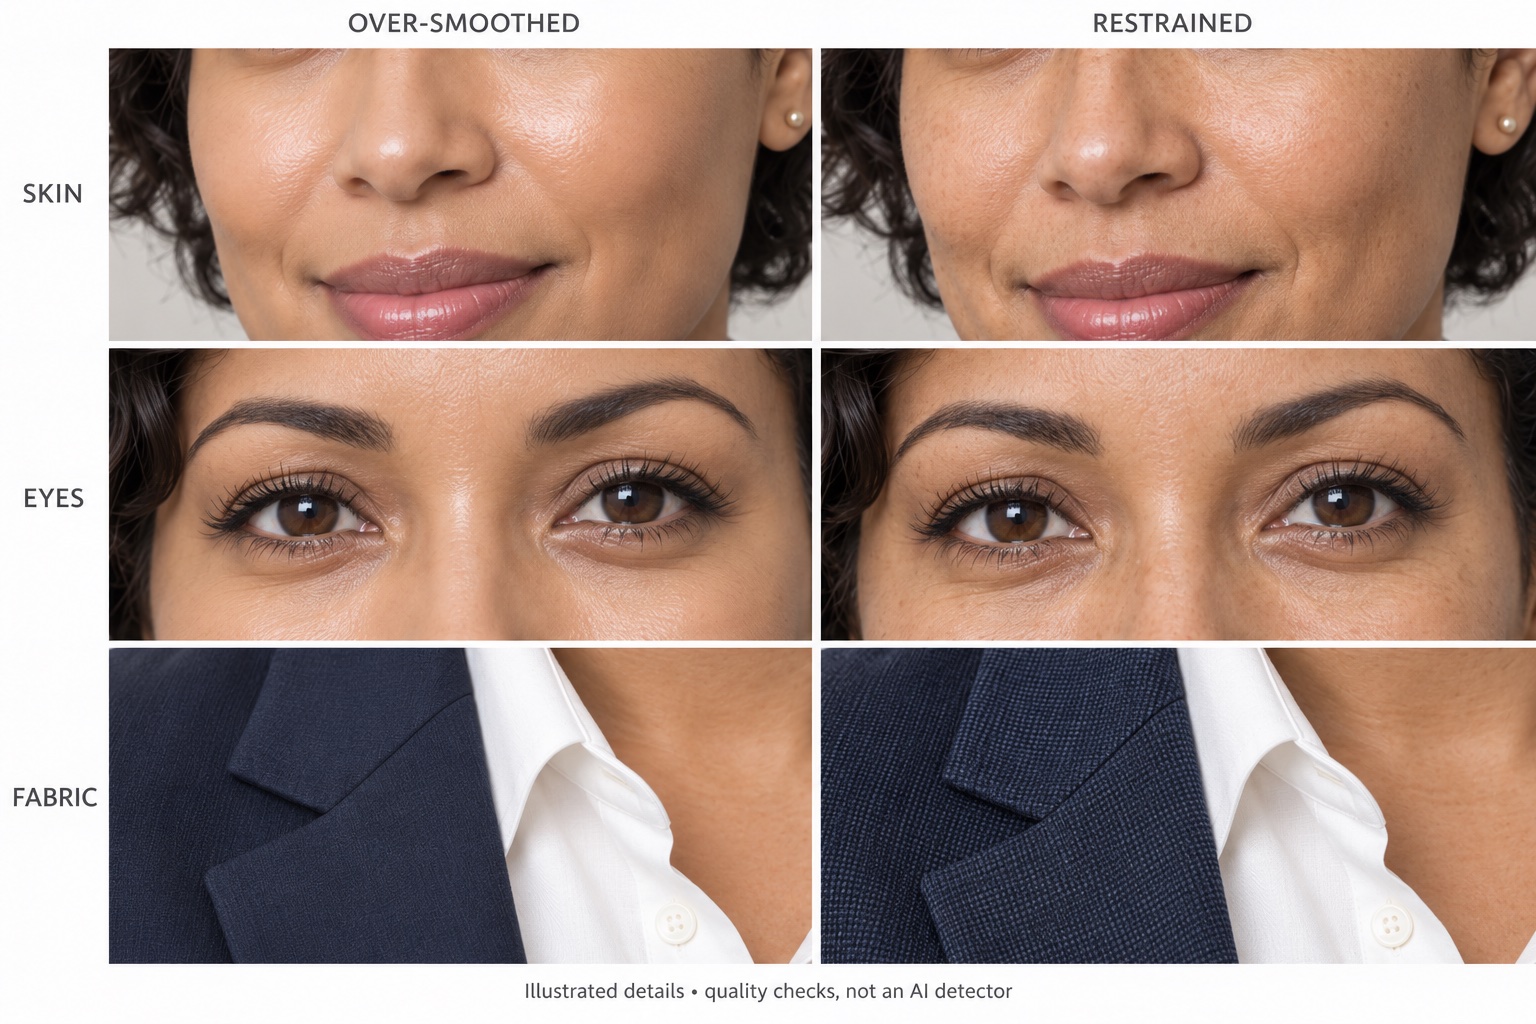
Illustrated details, not a detector: use the plate to decide where to look in your own portrait.
3. Clothing: does the jacket survive close inspection?
Move away from the face. Follow the lapel down to the collar.
Does the seam continue? Does a button belong to the fabric around it? Does a fold have an understandable beginning and end?
The illustrated blazer makes this check easy: the left treatment softens the weave, while the right preserves more fabric detail. A portrait can have a convincing face and still lose credibility through a collar that melts into the neck.
First move: if the defect is isolated and you can edit without disturbing the subject, repair that area on a copy. If several seams, folds, and boundaries fail together, choose another output.
4. Edges: where does the person end?
Trace the ear against the background, the hairline above the forehead, and the collar beneath the jaw. Look for merged earlobes, stray shapes, or a pale cutout halo.
Inspect these boundaries once at native size, then return to the size people will actually see. Extreme enlargement can make ordinary compression and softness seem more alarming than they are.
First move: fix a small background-edge problem if the anatomy is intact. Reject a malformed ear or altered facial outline.
Make the comparison fair
The more dramatic portrait usually wins an unfair contest. Give one image better light, a different expression, and a sharper crop, and you've changed several things at once.
Keep the face size, crop, and display conditions consistent. Compare likeness first, then treatment.
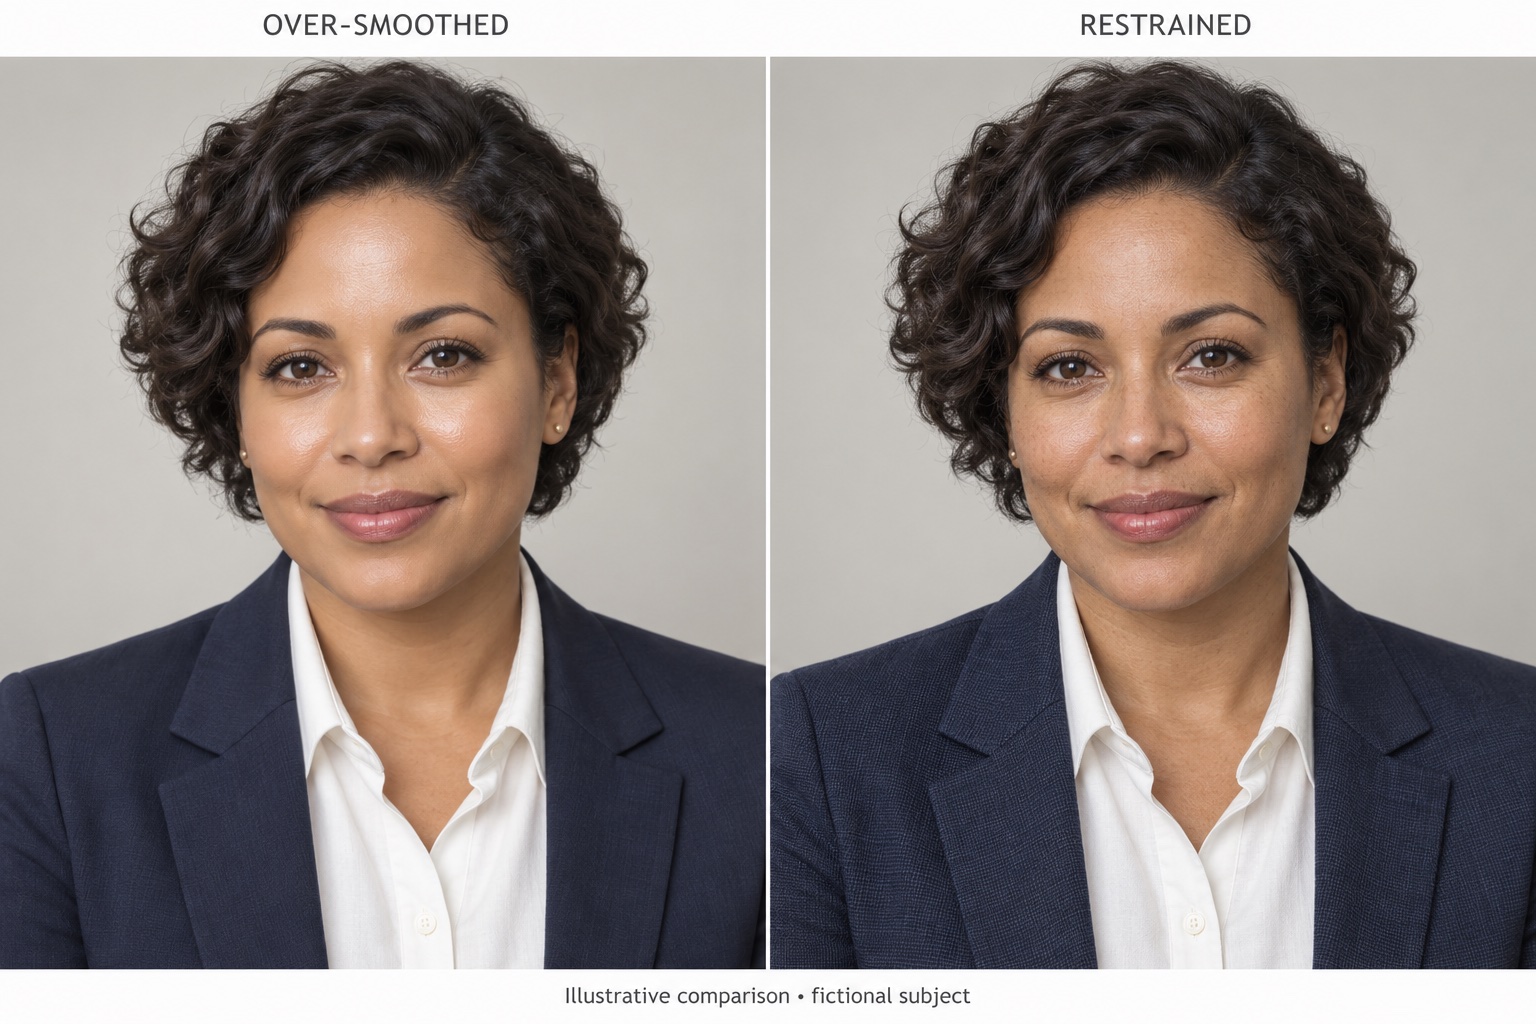
Matched fictional portraits make the treatment visible. These panels do not measure the effect of a prompt or model.
| Check | Over-smoothed treatment in the illustration | Restrained treatment in the illustration | Decision for your own image |
|---|---|---|---|
| Skin | More uniform cheek surface and broad gloss | More tonal and surface variation | Keep detail that fits your reference |
| Eyes | Coherent reflected light is still possible | Coherent reflected light is still possible | Inspect anatomy and lighting together |
| Fabric | Weave and seams are softer | Weave and seams are more legible | Check that structure continues |
| Identity | A polished finish says little about likeness | Added detail says little about likeness | Compare with a recent real photo |
Our images explain these choices. They do not show that a particular prompt or model achieved a measured improvement. For a fuller identity check, use the MyPhotoAI likeness review.
Give the generator a smaller job
A request such as “perfect executive headshot, flawless skin, ultra-sharp, luxury editorial” leaves several competing ideas to interpret. Try describing the portrait you need in observable terms.
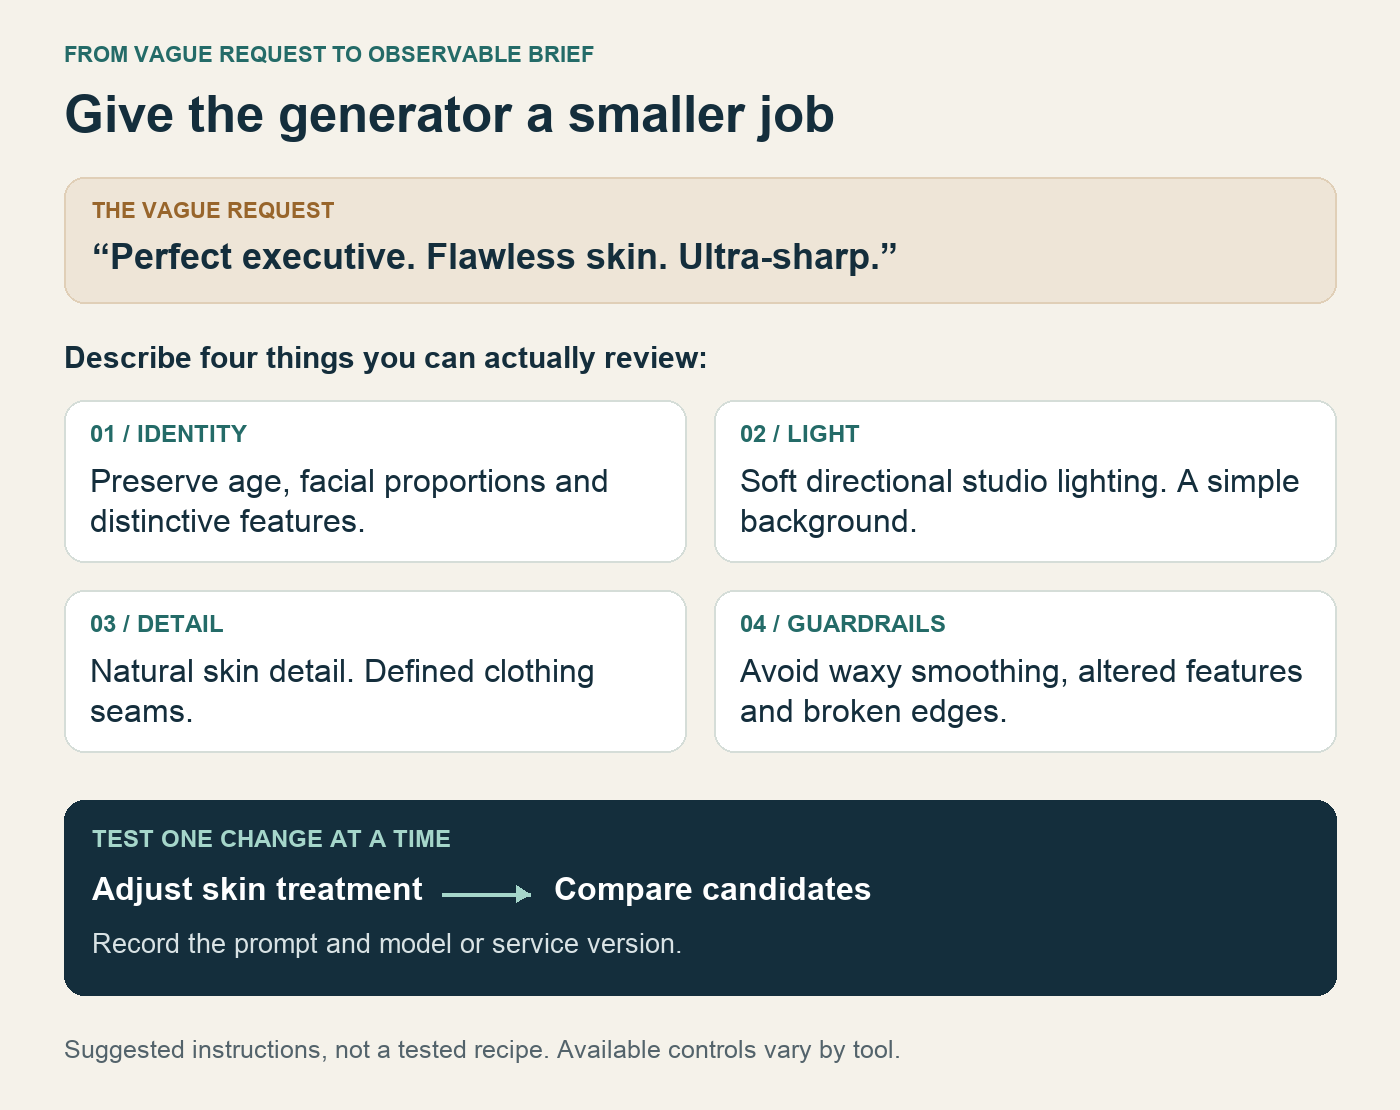
Turn a mood into observable instructions. Test one change at a time rather than stacking demands.
If your tool accepts free-text instructions, a starting brief could be:
Professional head-and-shoulders portrait. Preserve the subject's facial proportions, age, expression, and distinctive features. Use soft directional studio lighting, natural skin detail, and clearly defined clothing seams. Keep the background simple.
If it offers a negative-prompt field, you could test:
Waxy skin, excessive smoothing, altered eye shape, changed jawline, melted collar, broken glasses, cutout halos, exaggerated sharpening.
These are suggested instructions, not a tested recipe. Tools interpret prompts differently, and some do not expose these controls. Record the prompt and model or service version when comparing outputs.
Change one instruction at a time. Start with skin treatment, compare the candidates, then address lighting or clothing. Asking for every kind of “realism” at once makes it harder to see what helped.
Choose clear, current source photos. If a reference is blurry or heavily filtered, another sharp-looking result may simply invent more convincing detail.
Edit gently, and know when to stop
Keep the original output. Work on a copy.
For a face that already resembles you, restrained adjustments to exposure, contrast, or an isolated distraction may be sufficient. Inspect each change at normal viewing size. Stop when halos appear, skin turns gritty, or the face begins to look older than the reference.
In Camera Raw, Adobe describes Texture as a control for smoothing or accentuating existing detail, while Clarity increases local contrast.3 Use those controls gently on a small area, comparing the copy with the original after each change.
Be particularly cautious with texture overlays. A layer of generic pores cannot tell you what the person's skin actually looks like. The same applies to invented freckles and reconstructed eyelashes.
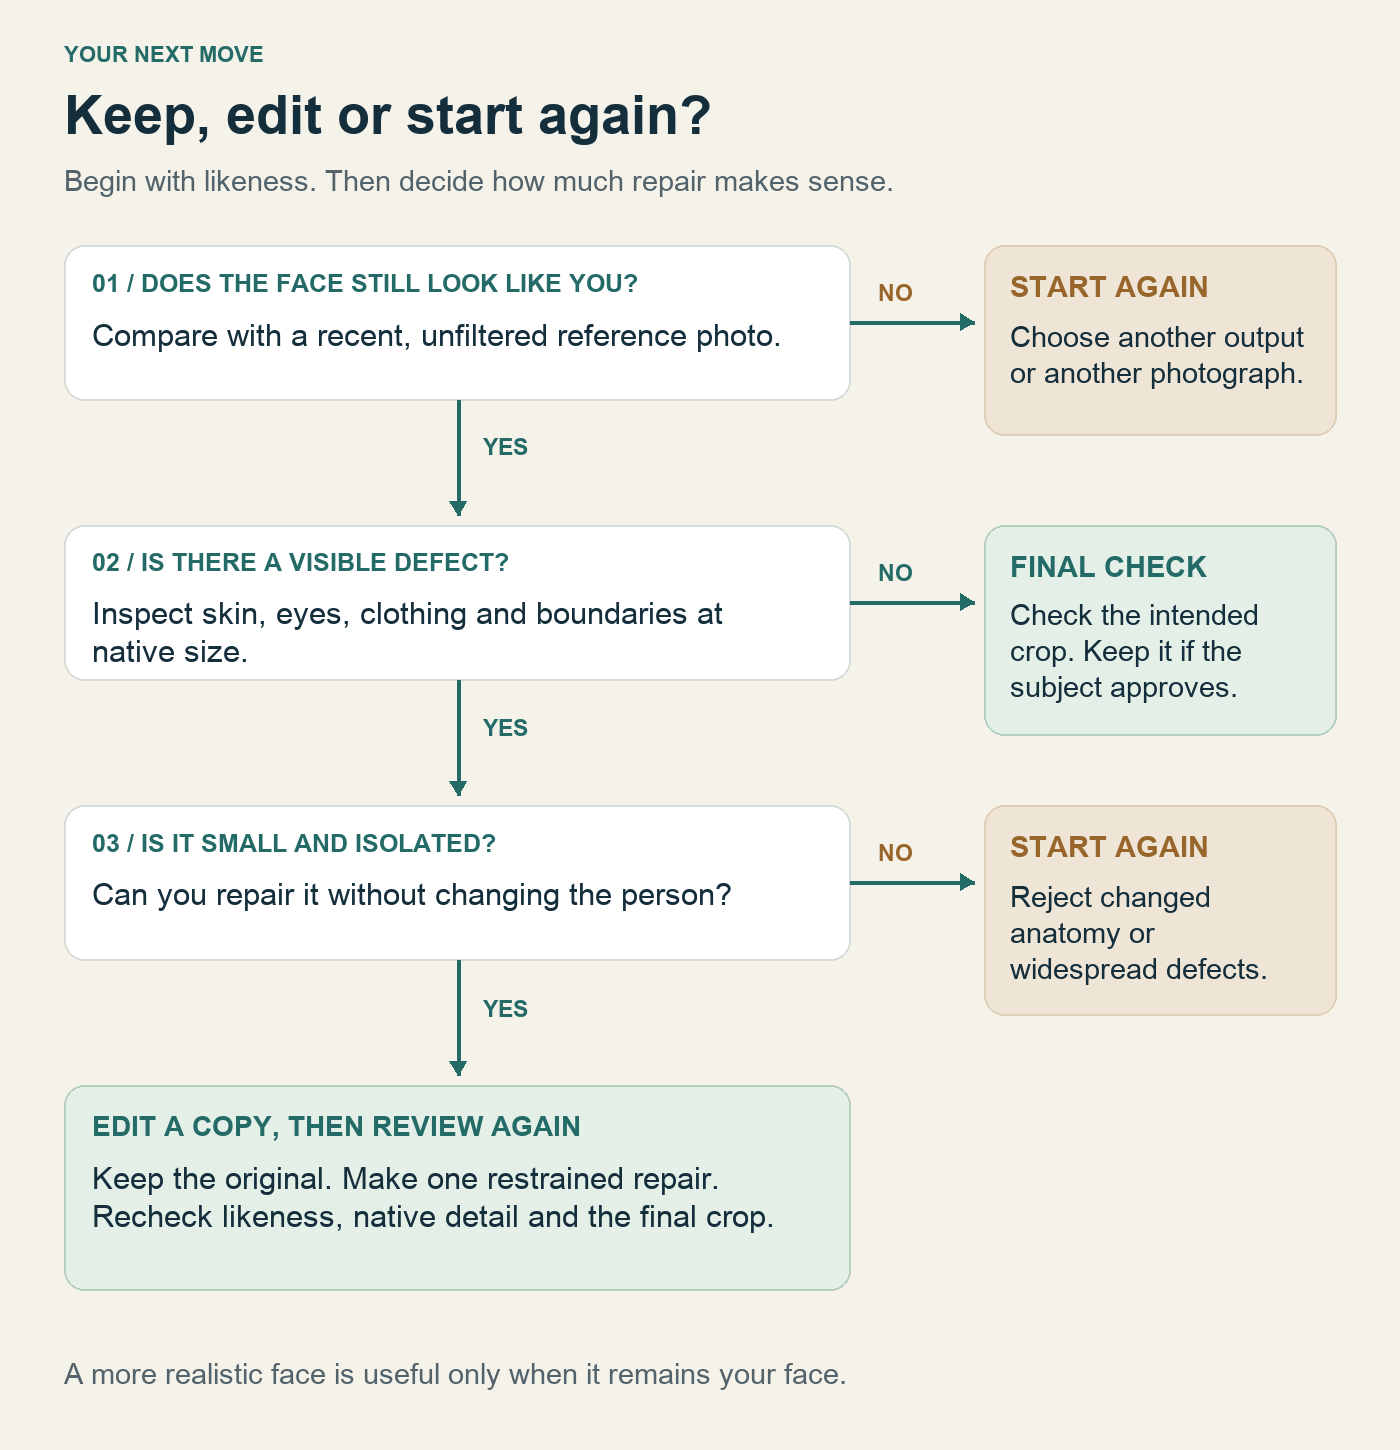
Use this route before doing more retouching. A small repair earns another review, not an automatic pass.
If several facial features are wrong, return to generation or use another photograph. The retouching-versus-generation guide can help you choose the scope of the next step.
Return to the little profile circle
Now repeat the opening scene.
View the revised portrait at native resolution, in the intended profile crop, and beside your reference photo. Ask someone who knows you what looks different before telling them which image you prefer.
Keep the candidate when the subject approves the likeness, the details survive normal inspection, and the final crop works for its destination. Revise an isolated defect. Reject a materially changed face.
The jacket can be impeccable. The light can be beautiful. The picture still has to feel familiar when your colleague opens the meeting invitation.
You should be able to leave that little circle on screen without wanting to explain it.