Being “photogenic” is not a fixed facial trait. It is a repeatable skill: controlling camera distance, light, posture, expression and timing long enough to make a frame that feels like you.
This seven-day plan takes about ten minutes a day. Use the same phone, place and light so you can see which small change caused the improvement.
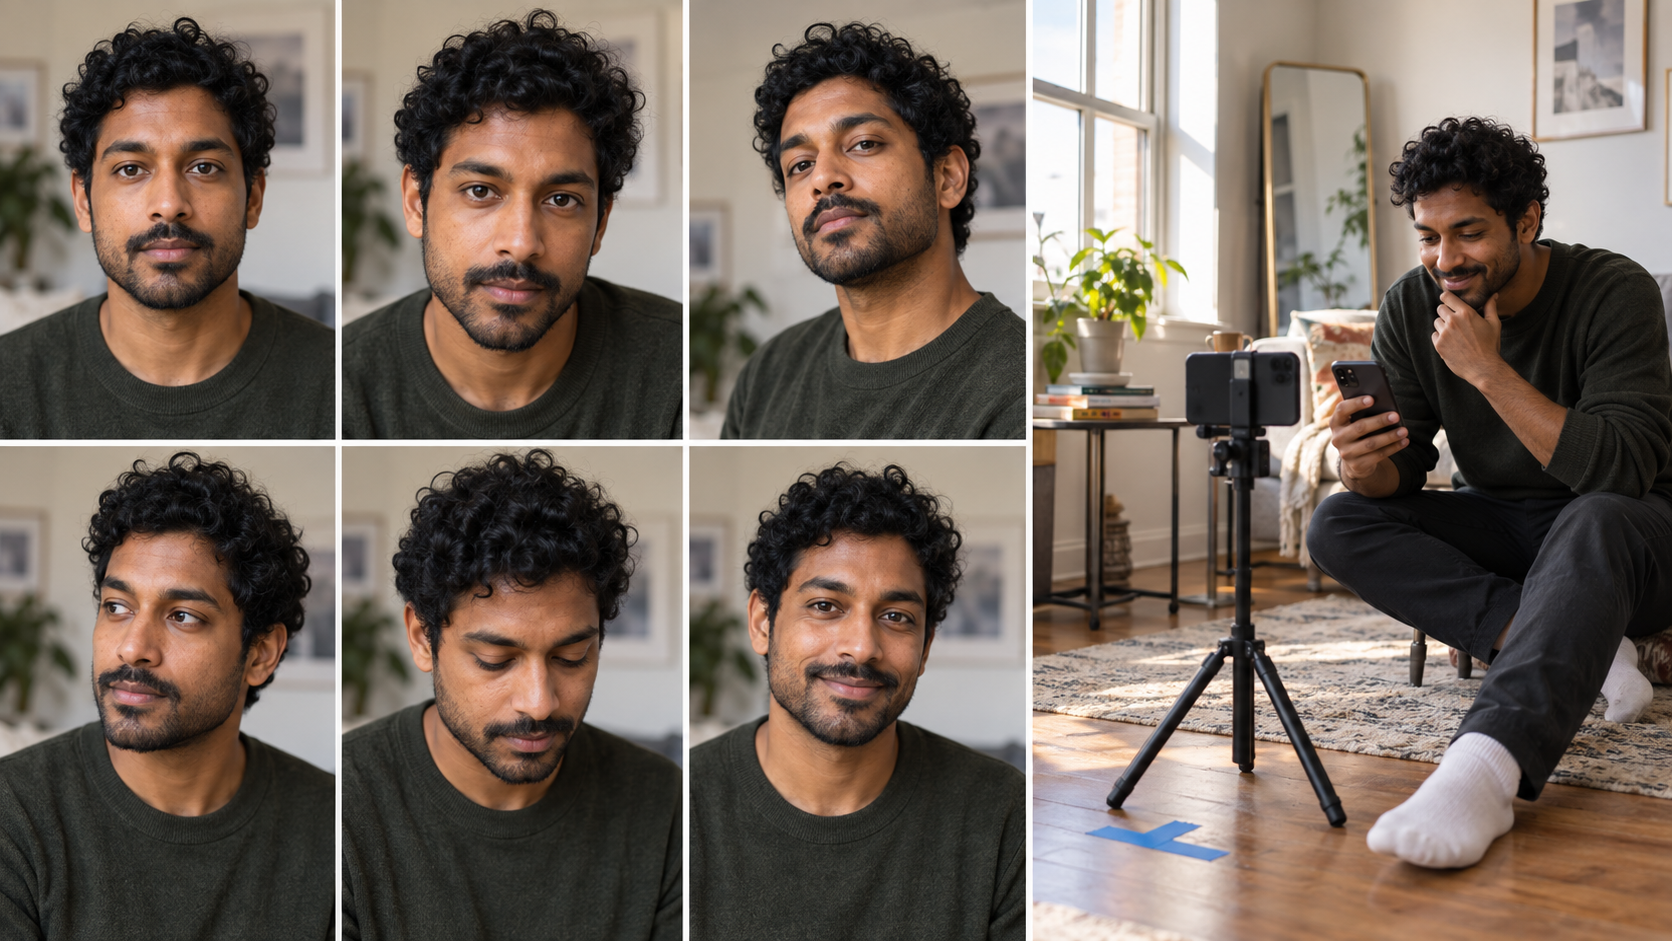
Editorial practice illustration. The contact sheet demonstrates the process, not a beauty ranking.
Before day one: make a tiny home studio
You need a phone, a stable support or tripod, a window and a piece of tape.
- Face the window at a slight angle.
- Put the phone at roughly eye level.
- Step back rather than holding the phone at selfie distance.
- Mark your foot position with tape.
- Turn off beauty filters and portrait effects for the test.
Why step back? A 2024 study of facial distortion in digital photography measured midface distortion at short “selfie” distances on both smartphones and full-frame cameras.1 Distance changes perspective; it is not your face suddenly looking wrong.
Use the rear camera with a timer if practical, or place the front camera farther away. Keep the lens clean.
Day 1: find neutral
Take six frames without trying to “look good.” Breathe out, drop the shoulders and look at the lens.
Your task is to notice tension:
- Is the jaw clenched?
- Are the eyebrows lifted?
- Are you holding your breath?
- Is your neck reaching toward the camera?
Choose the frame that feels most like a normal conversation. That is your neutral baseline.
Day 2: change only camera distance
Keep your stance and expression the same. Take frames at three distances, reframing digitally or with a modest optical zoom so the head remains a similar size.
Label them near, middle and far. Do not ask which face is “better.” Ask which perspective feels most natural and which retains detail.
Save the winner as your distance reference.
Day 3: test three shoulder angles
Start square to camera. Then rotate the torso slightly left and slightly right while keeping the face near the lens.
Make the turn small. Research on portrait pose and emotional expression found that a head turn of about 15 degrees can change perceived emotional expressivity.2 The practical lesson is to test both directions instead of accepting the myth that everyone has one permanent “good side.”
Compare:
- shoulder line
- neck comfort
- eye contact
- how open or guarded the pose feels
Keep the angle that matches the message you want.
Day 4: use the chin as a framing control
Move the face forward a little from the top of the spine, then lower the chin a fraction. Take one frame. Return to neutral, then test slightly higher and slightly lower.
Avoid pushing until the pose hurts or feels theatrical. You are looking for a small adjustment that separates the jaw from the neck while keeping the eyes relaxed.
Review the whole posture, not one feature in isolation.
Day 5: build an expression ladder
Take four versions:
- Neutral and attentive
- Soft eyes, closed-mouth warmth
- Small smile
- Full smile or laugh
A two-experiment study of smiles in portrait photography found that portraits with a subtle smile received higher spontaneous preference and aesthetic ratings than neutral versions.3 That does not mean everyone must smile. It means a small expression change can alter how a picture is received.
For a natural transition, look away, breathe out and bring your eyes back to the lens as the timer fires. Use the smile practice guide if your expression freezes on command.
Day 6: change the light, not your face
Repeat your strongest pose in three setups:
- facing the window
- turned about 45 degrees from it
- one step farther from it
Watch the catchlights in the eyes and the shadow side of the face. Choose the light that supports your goal: flatter and open, or more dimensional and dramatic.
Do not use a ceiling light as the only source if it creates deep eye sockets. Move first; edit later.
Day 7: run a five-minute session
Set a timer and make a 12-frame contact sheet:
- 3 neutral/attentive
- 3 small smiles
- 3 full smiles
- 3 free variations
Keep your chosen distance, shoulder angle and light. Change one thing per short burst.
Then wait ten minutes before reviewing. Pick three frames, not one. Your goal is a repeatable range rather than a single lucky shot.
How to review without appearance spirals
Use observable language.
Instead of “I look bad,” write:
- “The phone was too close.”
- “The overhead light hid my eyes.”
- “I lifted my chin when the timer started.”
- “The small smile feels more like me than the full smile.”
Delete comments about age, weight, symmetry or worth. They do not tell you what to change in the next frame.
Your personal photo recipe
Finish this sentence:
Phone at ___ height, about ___ steps away, body turned ___, face toward ___, light from ___, expression cue ___ .
That one line is more useful than fifty disconnected posing tips. Save it in your phone before your next event, team-photo day or professional headshot session.
The short-form version
For a Reel or Short, film the seven days as fast cuts:
- Too-close selfie → step back
- Square shoulders → slight turn
- Chin extremes → tiny adjustment
- Forced smile → expression ladder
- Ceiling light → window light
- Random shots → contact sheet
- Final three-frame range
The hook is not “fix your face.” It is “change one variable.” That framing is both more honest and more useful.
If you need a polished image immediately, MyPhotoAI can help explore professional portrait directions. Use this practice plan anyway: knowing your preferred expression and framing improves every kind of portrait.
FAQ
Why do I look different in selfies?
Camera distance and lens perspective change proportions, and phone previews may also be mirrored. See the full headshot vs. selfie explanation.
How many photos should I take?
Enough to test a variable, not hundreds without a plan. Six to twelve frames per practice session is plenty.
Should I copy a celebrity pose?
Use it as an experiment, not a rule. Body proportions, light, lens and context differ.
What if I hate every frame?
Stop reviewing for the day. Return later and score only technical variables such as distance, light, posture and expression before judging the whole image.


