Pick your method in five seconds: use a mirror when you want speed and live framing. Use a phone timer when you want a cleaner, more natural-looking photograph with no phone covering part of the frame. Both work. The best choice is the one you can repeat without balancing your phone somewhere unsafe.
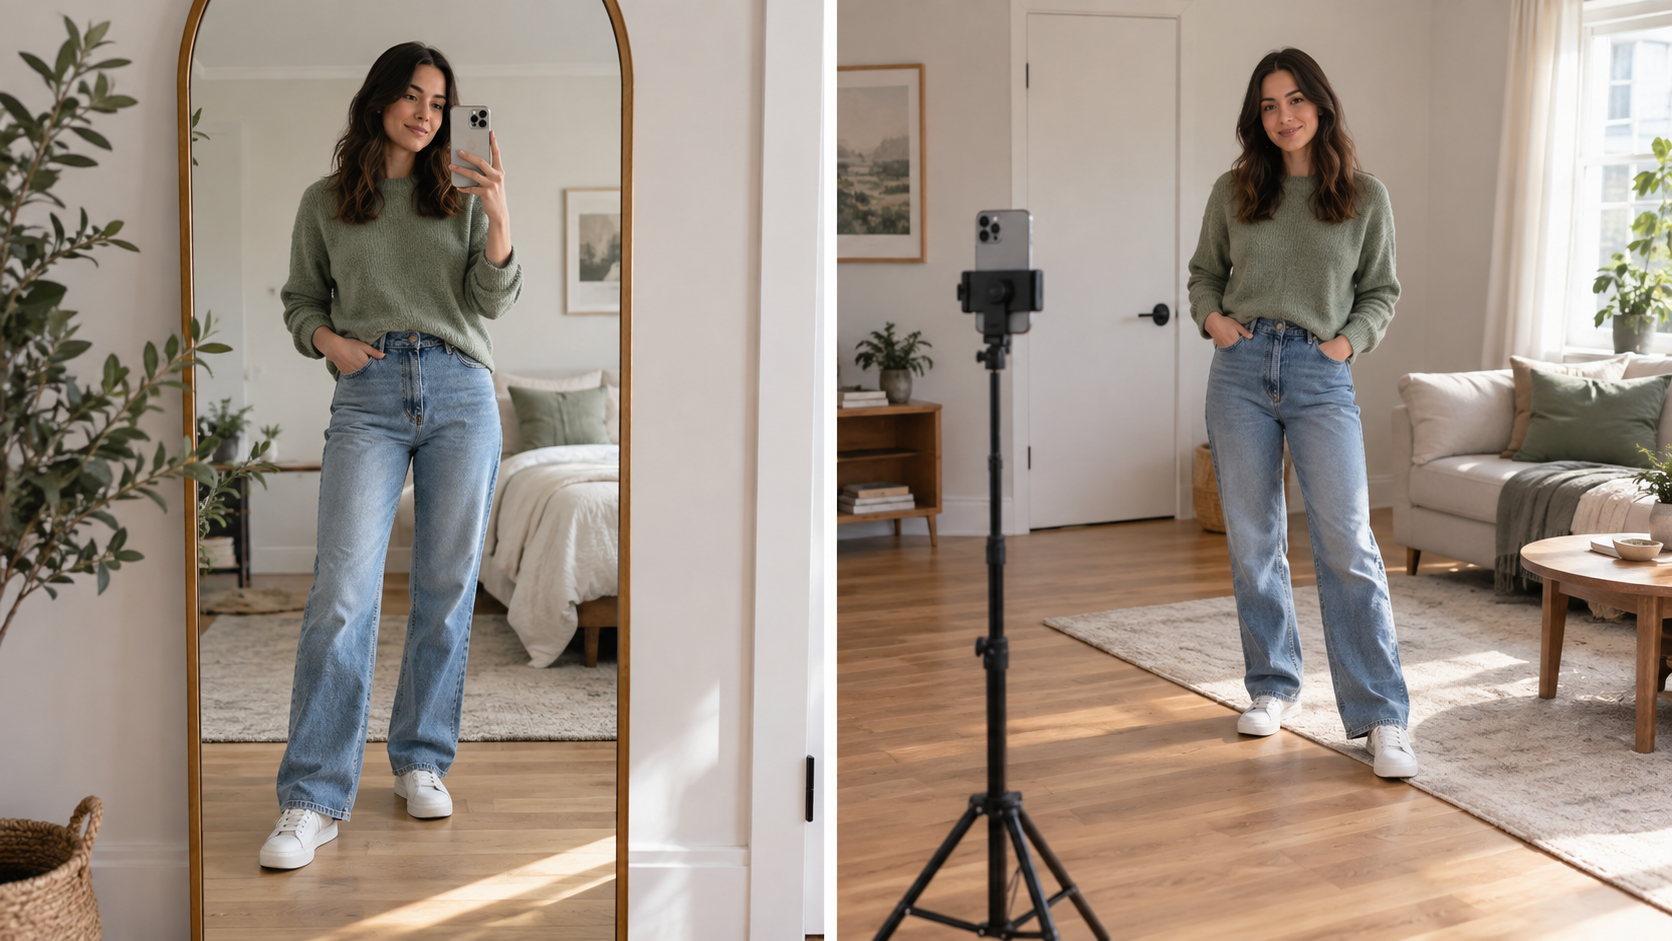
The same subject, outfit and room make the two methods easy to compare.
Mirror or timer: choose before you set up
| Choose the mirror when... | Choose the timer when... |
|---|---|
| You need a fast outfit check | You want the phone out of the final picture |
| You want to adjust the frame live | You want more distance from the camera |
| Your mirror and room are already clean | You have a stable shelf or tripod |
| A casual social look is the goal | A profile, portfolio or full-length reference is the goal |
Save that table. It prevents the common mistake of trying to make one setup do every job.
Method 1: the full-body mirror selfie
1. Clean the mirror and the phone lens
A small streak near your face can look like haze. Clean the mirror first, then wipe the camera lens with a soft cloth. Turn off any beauty filter that changes proportions or skin texture while you are testing the setup.
2. Give yourself more room than you think
Stand far enough back that your head and shoes fit with a little space above and below. If the room is tight, move the mirror rather than switching immediately to the widest camera setting. A very wide view can stretch objects near the edges.
Keep the phone close to chest or shoulder height for a neutral starting point. Raising it makes the upper body look larger; lowering it gives more visual weight to the legs. Neither is wrong, but the change should be intentional.
3. Square the vertical lines
Use a door frame, wall edge or mirror edge as a reference. If those lines lean dramatically, straighten the phone before changing your pose. Apple's current iPhone camera guide documents 3-, 5-, and 10-second timers plus grid and level controls for composing the frame.1
Even in a mirror shot, the grid helps you keep the phone level and leave equal breathing room around the body.
4. Decide whether the phone belongs in the picture
Holding the phone beside your face feels casual and direct. Holding it lower keeps the face visible but can pull attention toward the device. Try both, then view the result at ordinary feed size. Do not judge only while zoomed in.
5. Take a short sequence
Make one small change per frame:
- shift weight to the other foot;
- move the phone two inches higher;
- turn the body slightly;
- relax the hand that is not holding the phone;
- step a little farther from the mirror.
Five deliberate frames teach you more than fifty random ones.
Method 2: the phone-timer selfie
The timer method takes another minute to set up, but it removes the device from the composition and lets you use the rear camera if you prefer.
1. Stabilize the phone
Use a tripod, clamp or stable shelf. Do not lean an expensive phone against a rounded bottle or a pile of books near an edge. Place a soft object where you plan to stand so autofocus and exposure have a useful reference.
2. Start around waist height
Waist height is a practical neutral starting point for a full-body frame. Keep the phone upright, parallel to your body and far enough away to avoid relying on an extreme wide-angle view.
A published mathematical model of close-range selfies found that shorter camera distance changes perceived facial proportions.2 The study focuses on faces, but the practical lesson is broader: distance changes perspective. Step the camera back and crop later when the room allows.
3. Turn on the timer, grid and level
Google's Pixel Camera guidance documents a three-second selfie timer and hands-free triggers on supported devices.3 On an iPhone, choose a delay that gives you time to walk into position without rushing. Ten seconds is usually comfortable for a full-body setup.
Mark your standing position with a small piece of removable tape. Put the mark under the front of one shoe so you can return to the same distance after checking a frame.
4. Shoot a repeatable four-frame sequence
- Neutral stance, arms relaxed.
- Weight shifted, one hand occupied naturally.
- Body turned slightly, face returned toward the camera.
- One walking or adjusting frame for movement.
Keep the lighting and camera position fixed. If every variable changes, you cannot tell what improved the result.
Framing that survives a crop
Leave space around the body. A full-body photograph often becomes a vertical post, a square profile crop or a smaller card later. Cutting the shoes or hair at capture time removes those options.
For a more professional use, compare the frame with MyPhotoAI's professional headshot guide and business headshot examples. For social and dating contexts, the dating profile picture guide shows why a full-body image should support, not replace, a clear lead portrait.
The 30-second quality check
Before changing your pose again, ask:
- Are the eyes in focus?
- Are both shoes inside the frame?
- Is the phone level?
- Does the face look proportionate rather than stretched?
- Is one bright window or lamp pulling attention away?
- Does the background have anything you would not want to share?
If the source is soft, no upload setting can restore missing detail. Fix focus and camera movement first.
Choose the best frame without overthinking it
View the sequence as thumbnails. Keep the frames that read clearly at small size, then compare those at full size for focus and expression. A photograph that works only when enlarged is rarely the strongest social image.
If you want to explore a different background or portrait direction after capturing a clean source, use the profile picture maker. Start with a sharp, well-lit image that still looks like you.
Quick fixes
My legs look unusually long
Raise the phone, move it farther away and keep it more parallel to your body. Check whether a wide-angle setting is exaggerating the nearest part of the frame.
The mirror selfie looks hazy
Clean both the mirror and camera lens. Turn off filters, then test in softer light that does not bounce directly into the glass.
The timer photo is out of focus
Place an object at your standing mark, focus there, then remove it only after the phone has locked focus. Take several frames without moving the camera.
I never know what to do with my hands
Give one hand a small job: adjust a cuff, touch a pocket, hold a jacket or rest lightly at the waist. Keep the other hand relaxed rather than mirroring it.
The saveable setup
Mirror: clean glass, chest-height phone, full body plus breathing room, level verticals, five controlled variations.
Timer: stable support, waist-height phone, more camera distance, standing mark, ten-second delay, four-frame sequence.
That is enough for a repeatable full-body selfie session. You do not need a studio, a complicated pose list or dozens of attempts.


