The most natural shirtless selfie poses for men are built around posture, camera distance, and a simple action. You do not need to flex every muscle or copy a bodybuilding stage pose. Start with relaxed shoulders, turn the torso slightly, give your hands a job, and take a short sequence instead of one frozen frame.
This guide is for adults and focuses on tasteful, non-explicit portraits. If your goal is specifically underwear styling, use the dedicated men's underwear selfie guide instead. Here, the camera and pose do most of the work.
Choose a natural-looking goal and boundary
Pick one mood before you start:
- Casual: soft window light, loose posture, neutral expression.
- Athletic: stronger side light, upright stance, visible but unforced tension.
- Editorial: cleaner background, tailored trousers, deliberate hand placement.
- After-workout: honest setting, light movement, less polished styling.
Then decide the crop. A waist-up frame feels more social. A three-quarter frame gives your arms and posture room. A close crop makes expression more important and increases the chance of phone-lens distortion.
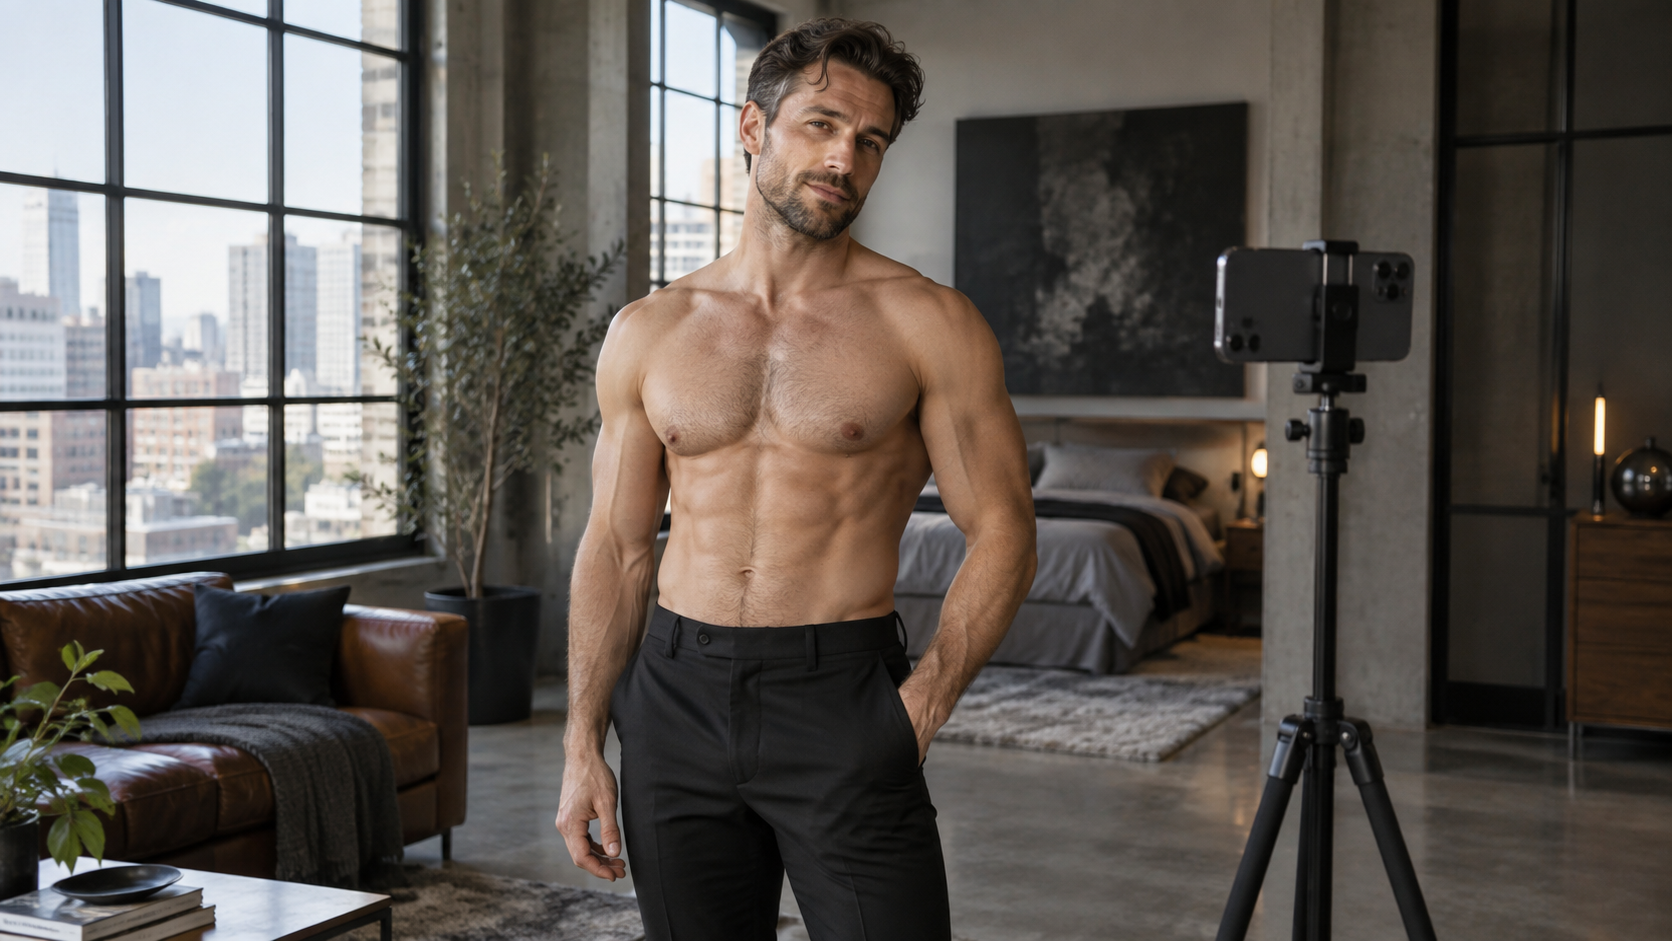
Warm up posture, shoulders, and breathing
Before taking photos, spend one minute finding a neutral position:
- Stand with feet about hip-width apart.
- Unlock the knees.
- Roll the shoulders up, back, and down.
- Lengthen the spine without lifting the chin.
- Breathe out slowly and let the ribs settle.
- Turn the torso 30 to 45 degrees from the phone.
- Bring the face back toward the lens.
The slight turn creates depth and keeps the shoulders from reading as one flat line. Canon's portrait guidance recommends working through gradual movement, angling the body, and keeping the arms from pressing flat against the torso. 1
If you want your torso to look defined, use side light rather than tensing every muscle. Stand beside a window so the light crosses the body. Rotate a few degrees until the shadows describe the shape you want.
Practice four useful poses
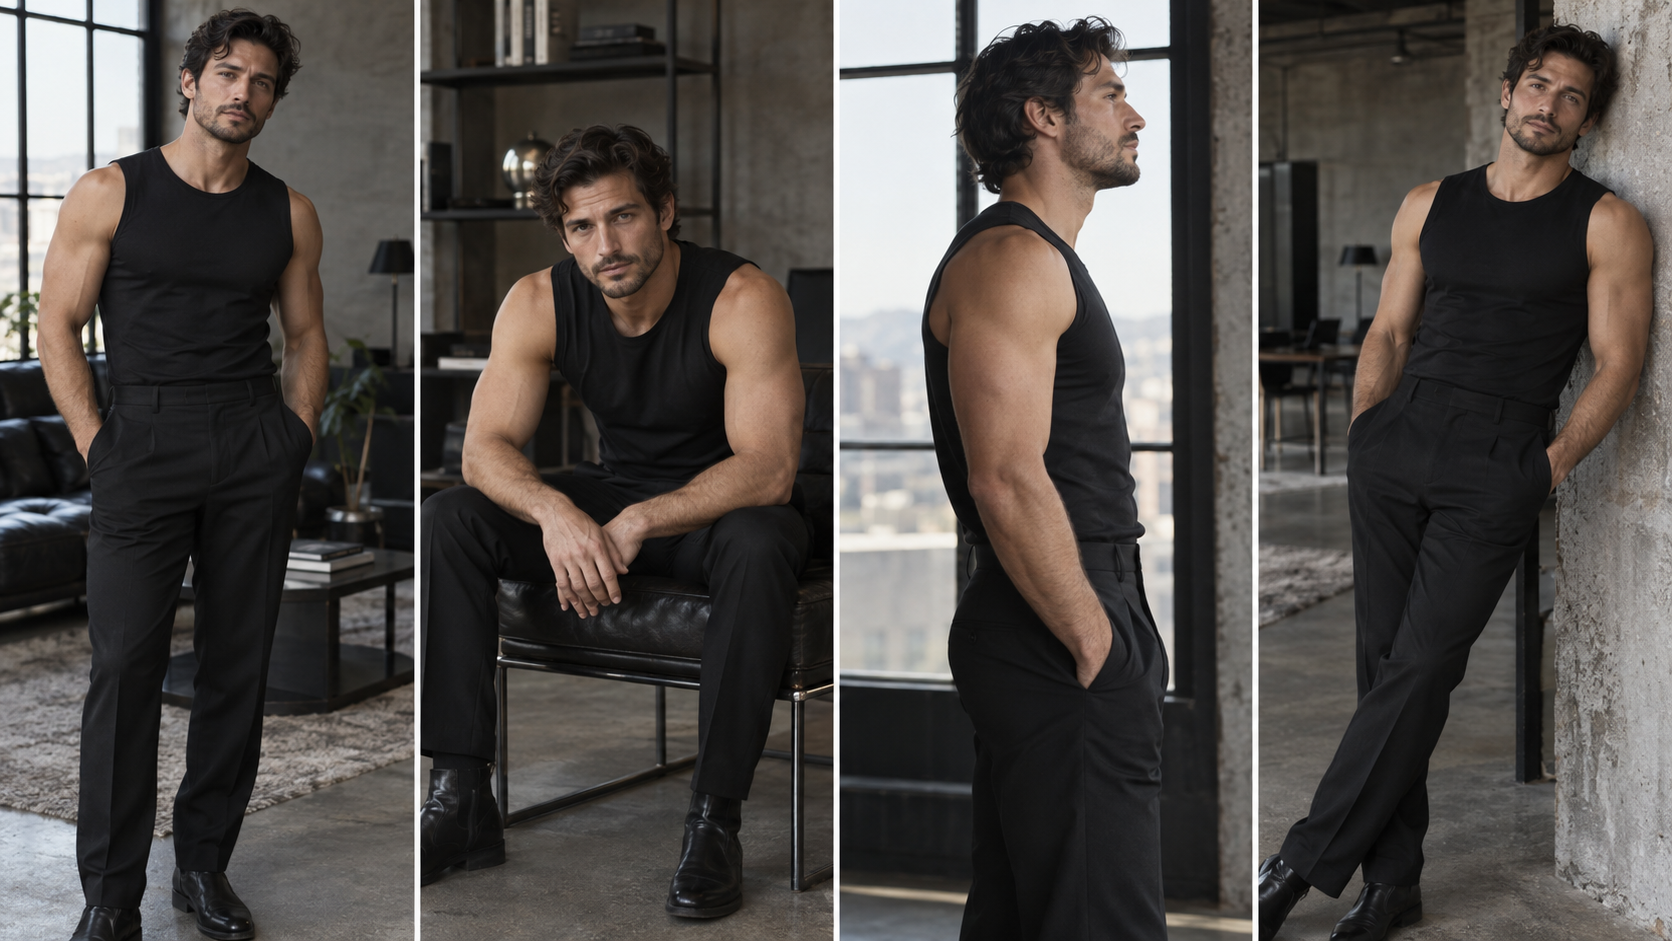
The relaxed three-quarter stand
Put more weight on the back leg. Turn the torso slightly away, then bring the nearest shoulder a little toward the lens. Place one hand in a pocket and leave the other loose.
The seated lean
Sit near the edge of a chair. Place forearms lightly on the thighs without rounding the back. Lean from the hips, not the neck. This brings the face closer while keeping the phone farther away.
The side profile
Stand parallel to the window and let the light skim across the chest and shoulder. Keep the far shoulder visible. A pure side view can look stiff, so rotate the face a little back toward the camera.
The wall lean
Rest one shoulder blade against a wall, not the whole back. Cross one ankle lightly over the other. Keep space between the upper arm and torso.
For more general expression, light, and framing practice, the broader good-selfie workflow is the better pillar. Apply that foundation here, then concentrate on torso angle and arm placement.
Review the contact sheet for tension and distortion
Camera distance matters more than many poses. Adobe Research shows how close camera perspective can exaggerate facial features. 2 Put the phone on a stable surface or tripod, step back, and crop afterward.
Adobe's phone portrait guide suggests starting several feet from the camera and testing longer phone focal lengths. 3 This usually produces calmer proportions than stretching an arm toward the lens.
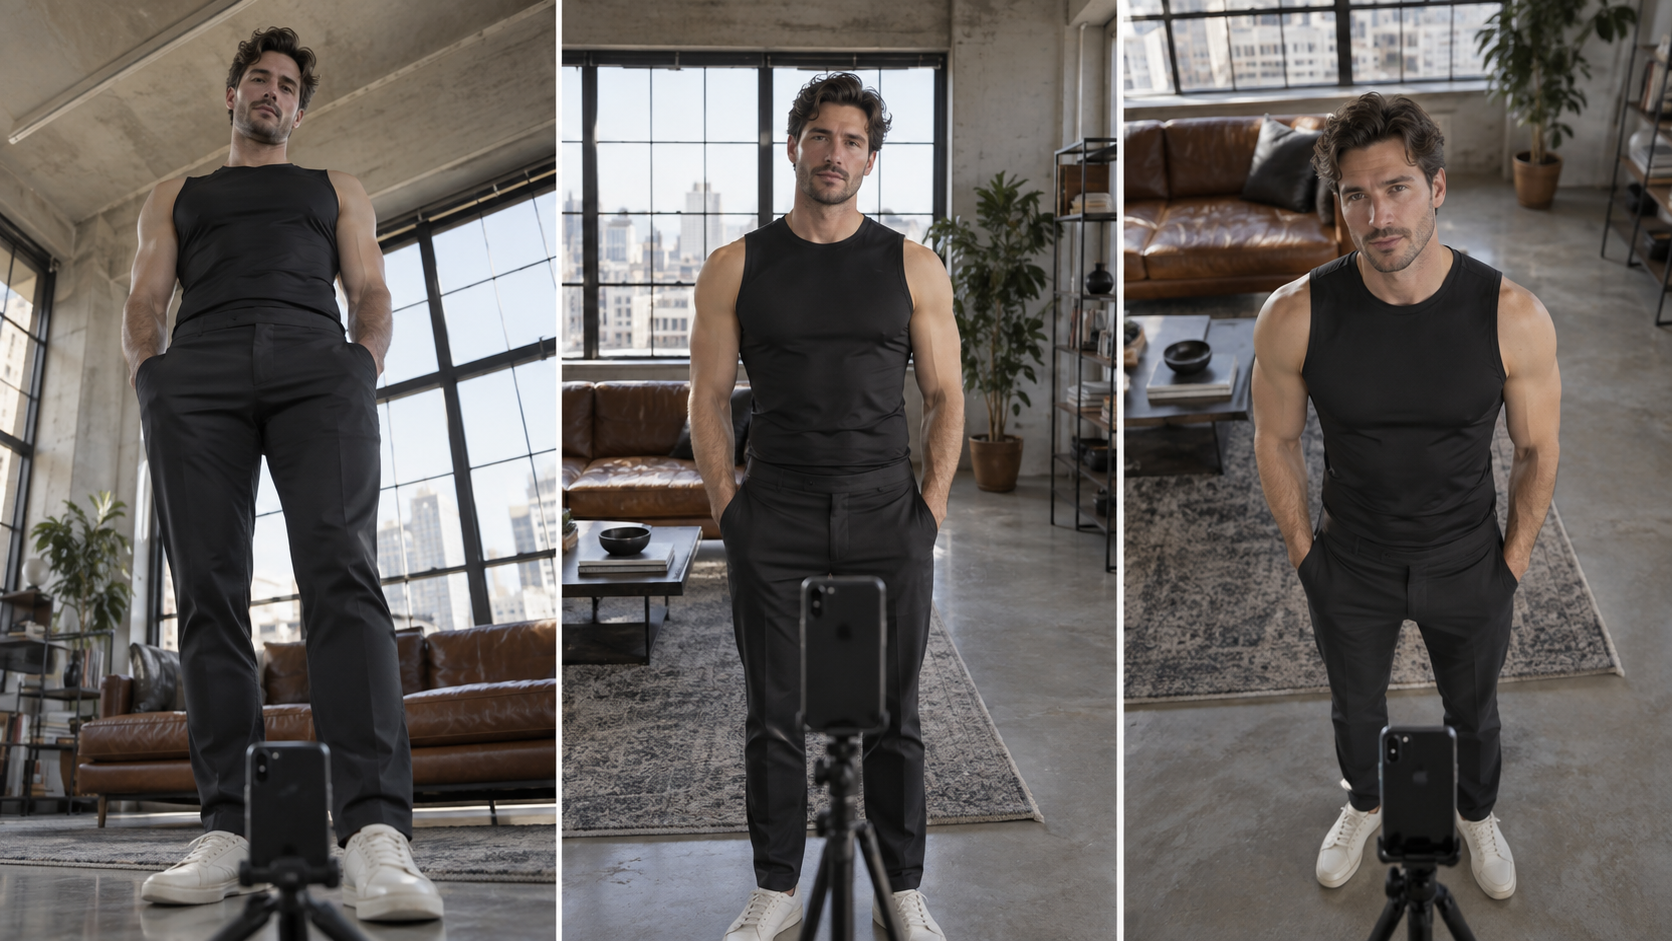
Compare three heights:
- Low lens: adds size to the torso but can overemphasize the lower body.
- Chest-height lens: a reliable neutral starting point.
- Slightly high lens: puts more attention on face and shoulders.
Judge the frame at full size and as a small thumbnail. Look for raised shoulders, clenched hands, a compressed neck, and a phone that blocks the body line. Delete near-duplicates quickly so you can compare real variations.
Mirror versus timer
A mirror makes it easy to see the pose as it happens, but the phone can dominate the composition. A timer frees both hands and creates a cleaner frame.
Apple's camera controls support three-second and ten-second timers plus burst capture, which is useful for moving through several expressions without touching the phone each time. 4
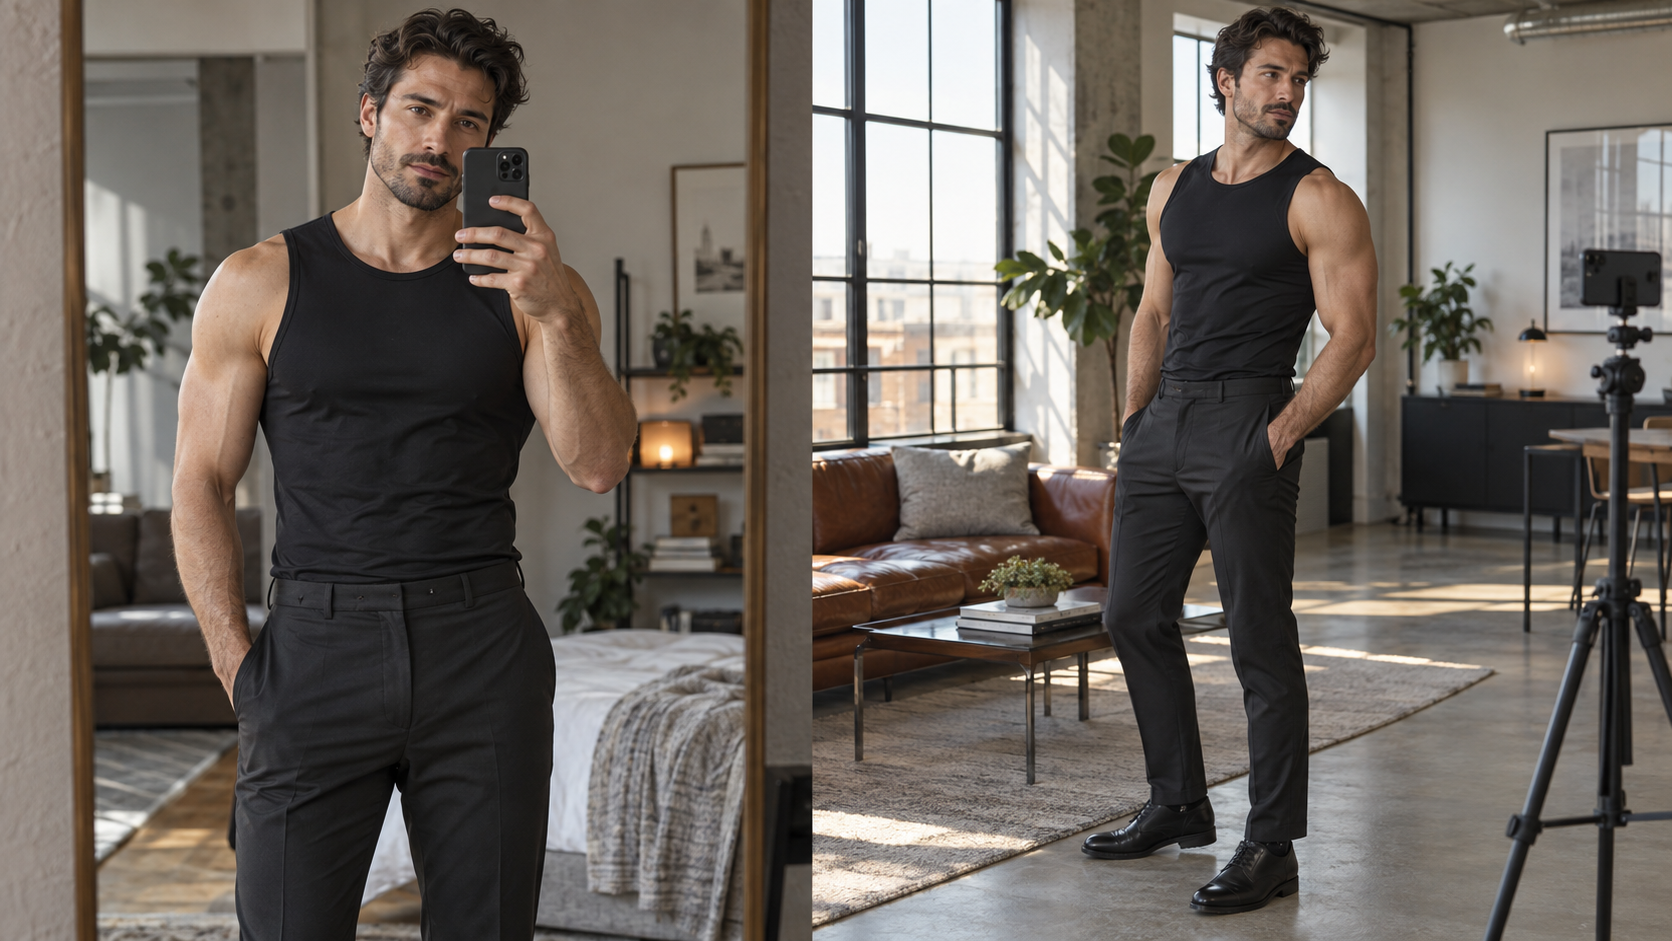
Use the mirror for a fast posture check. Use the timer for the final set. Clean the mirror, check every reflection, and remove location clues before sharing.
A five-minute repeatable routine
- Minute 1: clear the background and face the window.
- Minute 2: set the phone at chest height and step back.
- Minute 3: make the standing and seated versions.
- Minute 4: make the side and wall-lean versions.
- Minute 5: choose by expression first, posture second, definition third.
The best frame should still look like you. If you want to explore this setup from photos you already control, open the Loft Body Editorial look and choose it in the catalogue. Strong light, better distance, and a relaxed sequence will usually beat harder flexing or heavier editing.


